> ## Documentation Index
> Fetch the complete documentation index at: https://dripart-docs-recommend-assets-api.mintlify.site/llms.txt
> Use this file to discover all available pages before exploring further.
# 快速入门
本页将带你一步步完成自定义节点的创建过程。
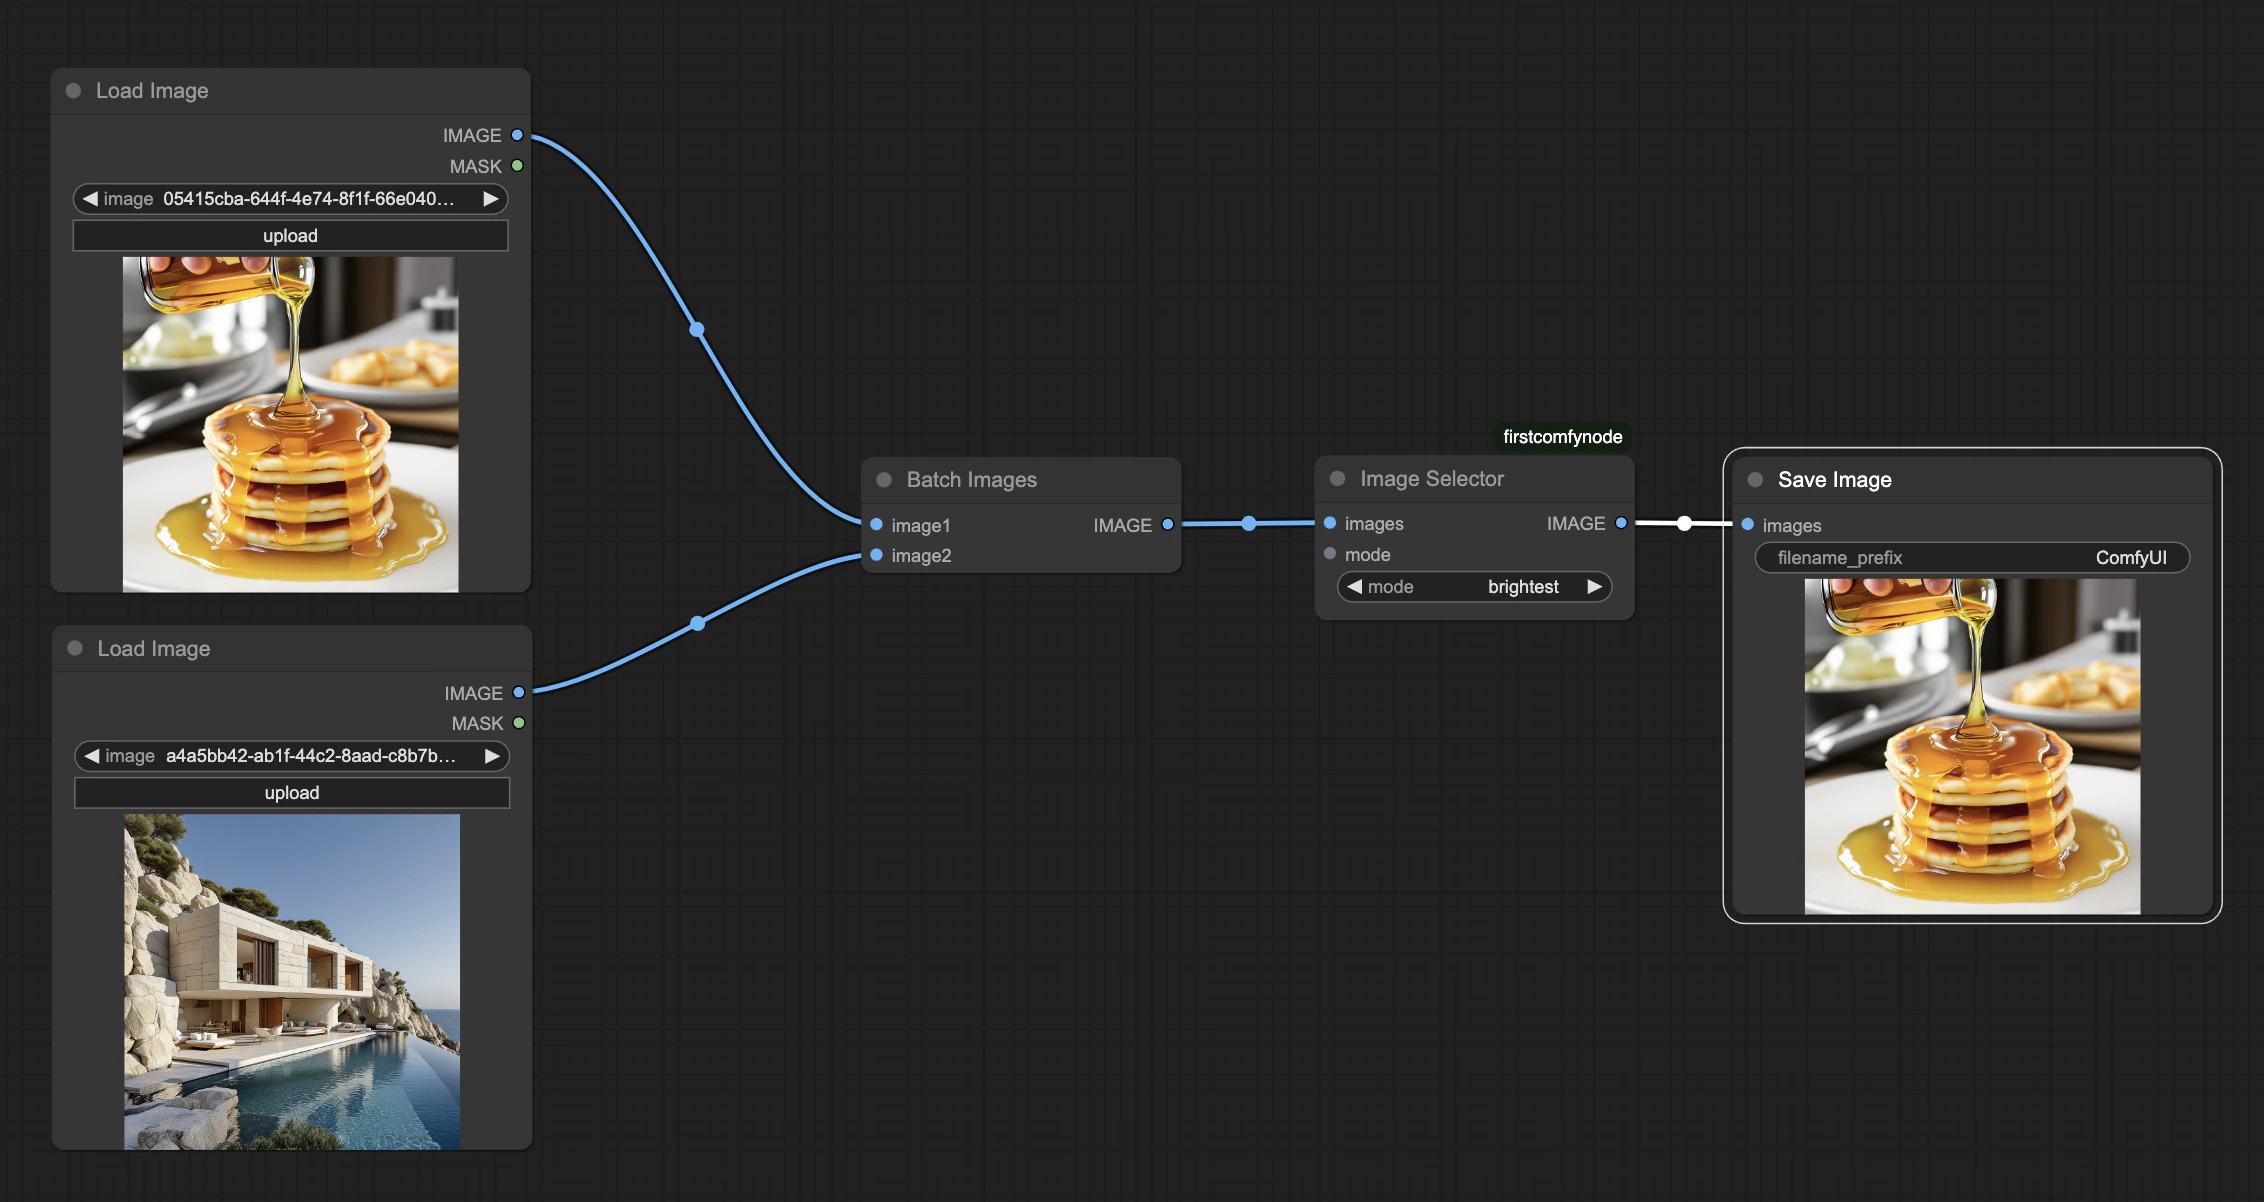
我们的示例将接收一批图片,并返回其中一张图片。最初,这个节点会返回平均颜色最亮的图片;随后我们会扩展它,支持多种选择标准,最后还会添加一些客户端代码。
本页假设你对 Python 或 Javascript 的了解很少。
完成本教程后,可以深入了解 [后端代码](./backend/server_overview) 和 [前端代码](./backend/server_overview)。
## 编写基础节点
### 前置条件
* 一个可用的 ComfyUI [安装环境](/zh/installation/manual_install)。开发建议手动安装 ComfyUI。
* 一个可用的 comfy-cli [安装环境](/zh/comfy-cli/getting-started)。
### 环境搭建
```bash theme={null}
cd ComfyUI/custom_nodes
comfy node scaffold
```
回答几个问题后,你会得到一个新的目录。
```bash theme={null}
~ % comfy node scaffold
You've downloaded .cookiecutters/cookiecutter-comfy-extension before. Is it okay to delete and re-download it? [y/n] (y): y
[1/9] full_name (): Comfy
[2/9] email (you@gmail.com): me@comfy.org
[3/9] github_username (your_github_username): comfy
[4/9] project_name (My Custom Nodepack): FirstComfyNode
[5/9] project_slug (firstcomfynode):
[6/9] project_short_description (A collection of custom nodes for ComfyUI):
[7/9] version (0.0.1):
[8/9] Select open_source_license
1 - GNU General Public License v3
2 - MIT license
3 - BSD license
4 - ISC license
5 - Apache Software License 2.0
6 - Not open source
Choose from [1/2/3/4/5/6] (1): 1
[9/9] include_web_directory_for_custom_javascript [y/n] (n): y
Initialized empty Git repository in firstcomfynode/.git/
✓ Custom node project created successfully!
```
### 定义节点
将以下代码添加到 `src/nodes.py` 末尾:
```Python src/nodes.py theme={null}
class ImageSelector:
CATEGORY = "example"
@classmethod
def INPUT_TYPES(s):
return { "required": { "images": ("IMAGE",), } }
RETURN_TYPES = ("IMAGE",)
FUNCTION = "choose_image"
```
自定义节点的基本结构详见[这里](/zh/custom-nodes/backend/server_overview)。
自定义节点通过 Python 类定义,必须包含以下四项:`CATEGORY`(指定新节点在添加节点菜单中的位置)、`INPUT_TYPES`(类方法,定义节点输入,详见[后文](/zh/custom-nodes/backend/server_overview#input-types))、`RETURN_TYPES`(定义节点输出)、`FUNCTION`(节点执行时调用的函数名)。
注意输入和输出的数据类型都是 `IMAGE`(单数),即使我们期望接收一批图片并只返回一张。在 Comfy 中,`IMAGE` 代表图片批量,单张图片视为批量大小为 1。
### 主函数
主函数 `choose_image` 会收到在 `INPUT_TYPES` 中定义的命名参数,并返回一个与 `RETURN_TYPES` 匹配的 `tuple`。由于我们处理的是图片,图片在内部以 `torch.Tensor` 存储,
```Python theme={null}
import torch
```
然后将函数添加到你的类中。图片的数据类型是形状为 `[B,H,W,C]` 的 `torch.Tensor`,其中 `B` 是批量大小,`C` 是通道数(RGB 为 3)。遍历该张量会得到 `B` 个形状为 `[H,W,C]` 的张量。`.flatten()` 方法将其变为一维张量,长度为 `H*W*C`,`torch.mean()` 求均值,`.item()` 将单值张量转为 Python 浮点数。
```Python theme={null}
def choose_image(self, images):
brightness = list(torch.mean(image.flatten()).item() for image in images)
brightest = brightness.index(max(brightness))
result = images[brightest].unsqueeze(0)
return (result,)
```
最后两行说明:
* `images[brightest]` 返回形状为 `[H,W,C]` 的张量。`unsqueeze` 用于在第 0 维插入一个长度为 1 的维度,得到 `[B,H,W,C]`,其中 `B=1`,即单张图片。
* `return (result,)` 末尾的逗号很重要,确保返回的是元组。
### 注册节点
要让 Comfy 识别新节点,必须在包级别可用。修改 `src/nodes.py` 末尾的 `NODE_CLASS_MAPPINGS` 变量。你需要重启 ComfyUI 才能看到更改。
```Python src/nodes.py theme={null}
NODE_CLASS_MAPPINGS = {
"Example" : Example,
"Image Selector" : ImageSelector,
}
# 可选:你可以在 `NODE_DISPLAY_NAME_MAPPINGS` 字典中重命名节点。
NODE_DISPLAY_NAME_MAPPINGS = {
"Example": "Example Node",
"Image Selector": "Image Selector",
}
```
关于 ComfyUI 如何发现和加载自定义节点的详细说明,请参见[节点生命周期文档](/zh/custom-nodes/backend/lifecycle)。
## 添加选项
这个节点可能有点无聊,所以我们可以加一些选项;比如一个小部件,让你选择最亮、最红、最绿或最蓝的图片。将你的 `INPUT_TYPES` 修改为:
```Python theme={null}
@classmethod
def INPUT_TYPES(s):
return { "required": { "images": ("IMAGE",),
"mode": (["brightest", "reddest", "greenest", "bluest"],)} }
```
然后更新主函数。我们用一个很简单的“最红”定义,即像素的平均 R 值除以三色平均值。所以:
```Python theme={null}
def choose_image(self, images, mode):
batch_size = images.shape[0]
brightness = list(torch.mean(image.flatten()).item() for image in images)
if (mode=="brightest"):
scores = brightness
else:
channel = 0 if mode=="reddest" else (1 if mode=="greenest" else 2)
absolute = list(torch.mean(image[:,:,channel].flatten()).item() for image in images)
scores = list( absolute[i]/(brightness[i]+1e-8) for i in range(batch_size) )
best = scores.index(max(scores))
result = images[best].unsqueeze(0)
return (result,)
```
## 调整 UI
也许我们想要一些可视化反馈,所以让我们发送一条文本消息进行显示。
### 从服务器发送消息
只需在 Python 代码中添加两行:
```Python theme={null}
from server import PromptServer
```
在 `choose_image` 方法末尾添加一行,将消息发送到前端(`send_sync` 需要一个唯一的消息类型和一个字典):
```Python theme={null}
PromptServer.instance.send_sync("example.imageselector.textmessage", {"message":f"Picked image {best+1}"})
return (result,)
```
### 编写客户端扩展
要为客户端添加 Javascript,在你的自定义节点目录下创建 `web/js` 子目录,并在 `__init__.py` 末尾导出 `WEB_DIRECTORY`:
```Python theme={null}
WEB_DIRECTORY = "./web/js"
__all__ = ['NODE_CLASS_MAPPINGS', 'WEB_DIRECTORY']
```
客户端扩展以 `.js` 文件保存在 `web/js` 子目录下,所以创建 `image_selector/web/js/imageSelector.js`,内容如下。(更多内容见 [客户端开发](./js/javascript_overview))
```Javascript theme={null}
import { app } from "../../scripts/app.js";
app.registerExtension({
name: "example.imageselector",
async setup() {
function messageHandler(event) { alert(event.detail.message); }
app.api.addEventListener("example.imageselector.textmessage", messageHandler);
},
})
```
我们所做的就是注册一个扩展,并在 `setup()` 方法中为我们发送的消息类型添加监听器。它会读取我们发送的字典(存储在 `event.detail` 中)。
停止 Comfy 服务器,重新启动,刷新网页,运行你的工作流。
### 完整示例
完整示例见[这里](https://gist.github.com/robinjhuang/fbf54b7715091c7b478724fc4dffbd03)。你可以下载示例工作流 [JSON 文件](https://github.com/Comfy-Org/docs/blob/main/public/workflow.json) 或在下方查看: