> ## Documentation Index
> Fetch the complete documentation index at: https://dripart-docs-recommend-assets-api.mintlify.site/llms.txt
> Use this file to discover all available pages before exploring further.
# ComfyUI-Manager のインストール
> 異なるセットアップにおける ComfyUI-Manager のインストール方法
## デスクトップ版ユーザー
[ComfyUI デスクトップ版](/installation/desktop/windows) を使用している場合、ComfyUI-Manager はすでに同梱されており、デフォルトで有効になっています。追加のインストールは不要です。
## ポータブル版ユーザー
[Windows ポータブル版](/installation/comfyui_portable_windows) を使用しているユーザーの場合、新しい ComfyUI-Manager は ComfyUI コアに組み込まれていますが、有効化する必要があります。
1. 管理者機能の依存関係をインストールします:
```bash theme={null}
.\python_embeded\python.exe -m pip install -r ComfyUI\manager_requirements.txt
```
2. 管理者機能を有効にして ComfyUI を起動します:
```bash theme={null}
.\python_embeded\python.exe -s ComfyUI\main.py --windows-standalone-build --enable-manager
pause
```
## 手動インストールユーザー
[手動インストール](/installation/manual_install) を行っているユーザーの場合、新しい ComfyUI-Manager は ComfyUI コアに組み込まれていますが、有効化する必要があります。
1. 仮想環境をアクティブにします:
```bash theme={null}
# Windows
venv\Scripts\activate
# Linux/macOS
source venv/bin/activate
```
2. 管理者機能の依存関係をインストールします:
```bash theme={null}
pip install -r manager_requirements.txt
```
3. ComfyUI 実行時に `--enable-manager` フラグを使用して管理者機能を有効にします:
```bash theme={null}
python main.py --enable-manager
```
### コマンドラインオプション
| フラグ | 説明 |
| ---------------------------- | --------------------------------------------------------------- |
| `--enable-manager` | ComfyUI-Manager を有効にします |
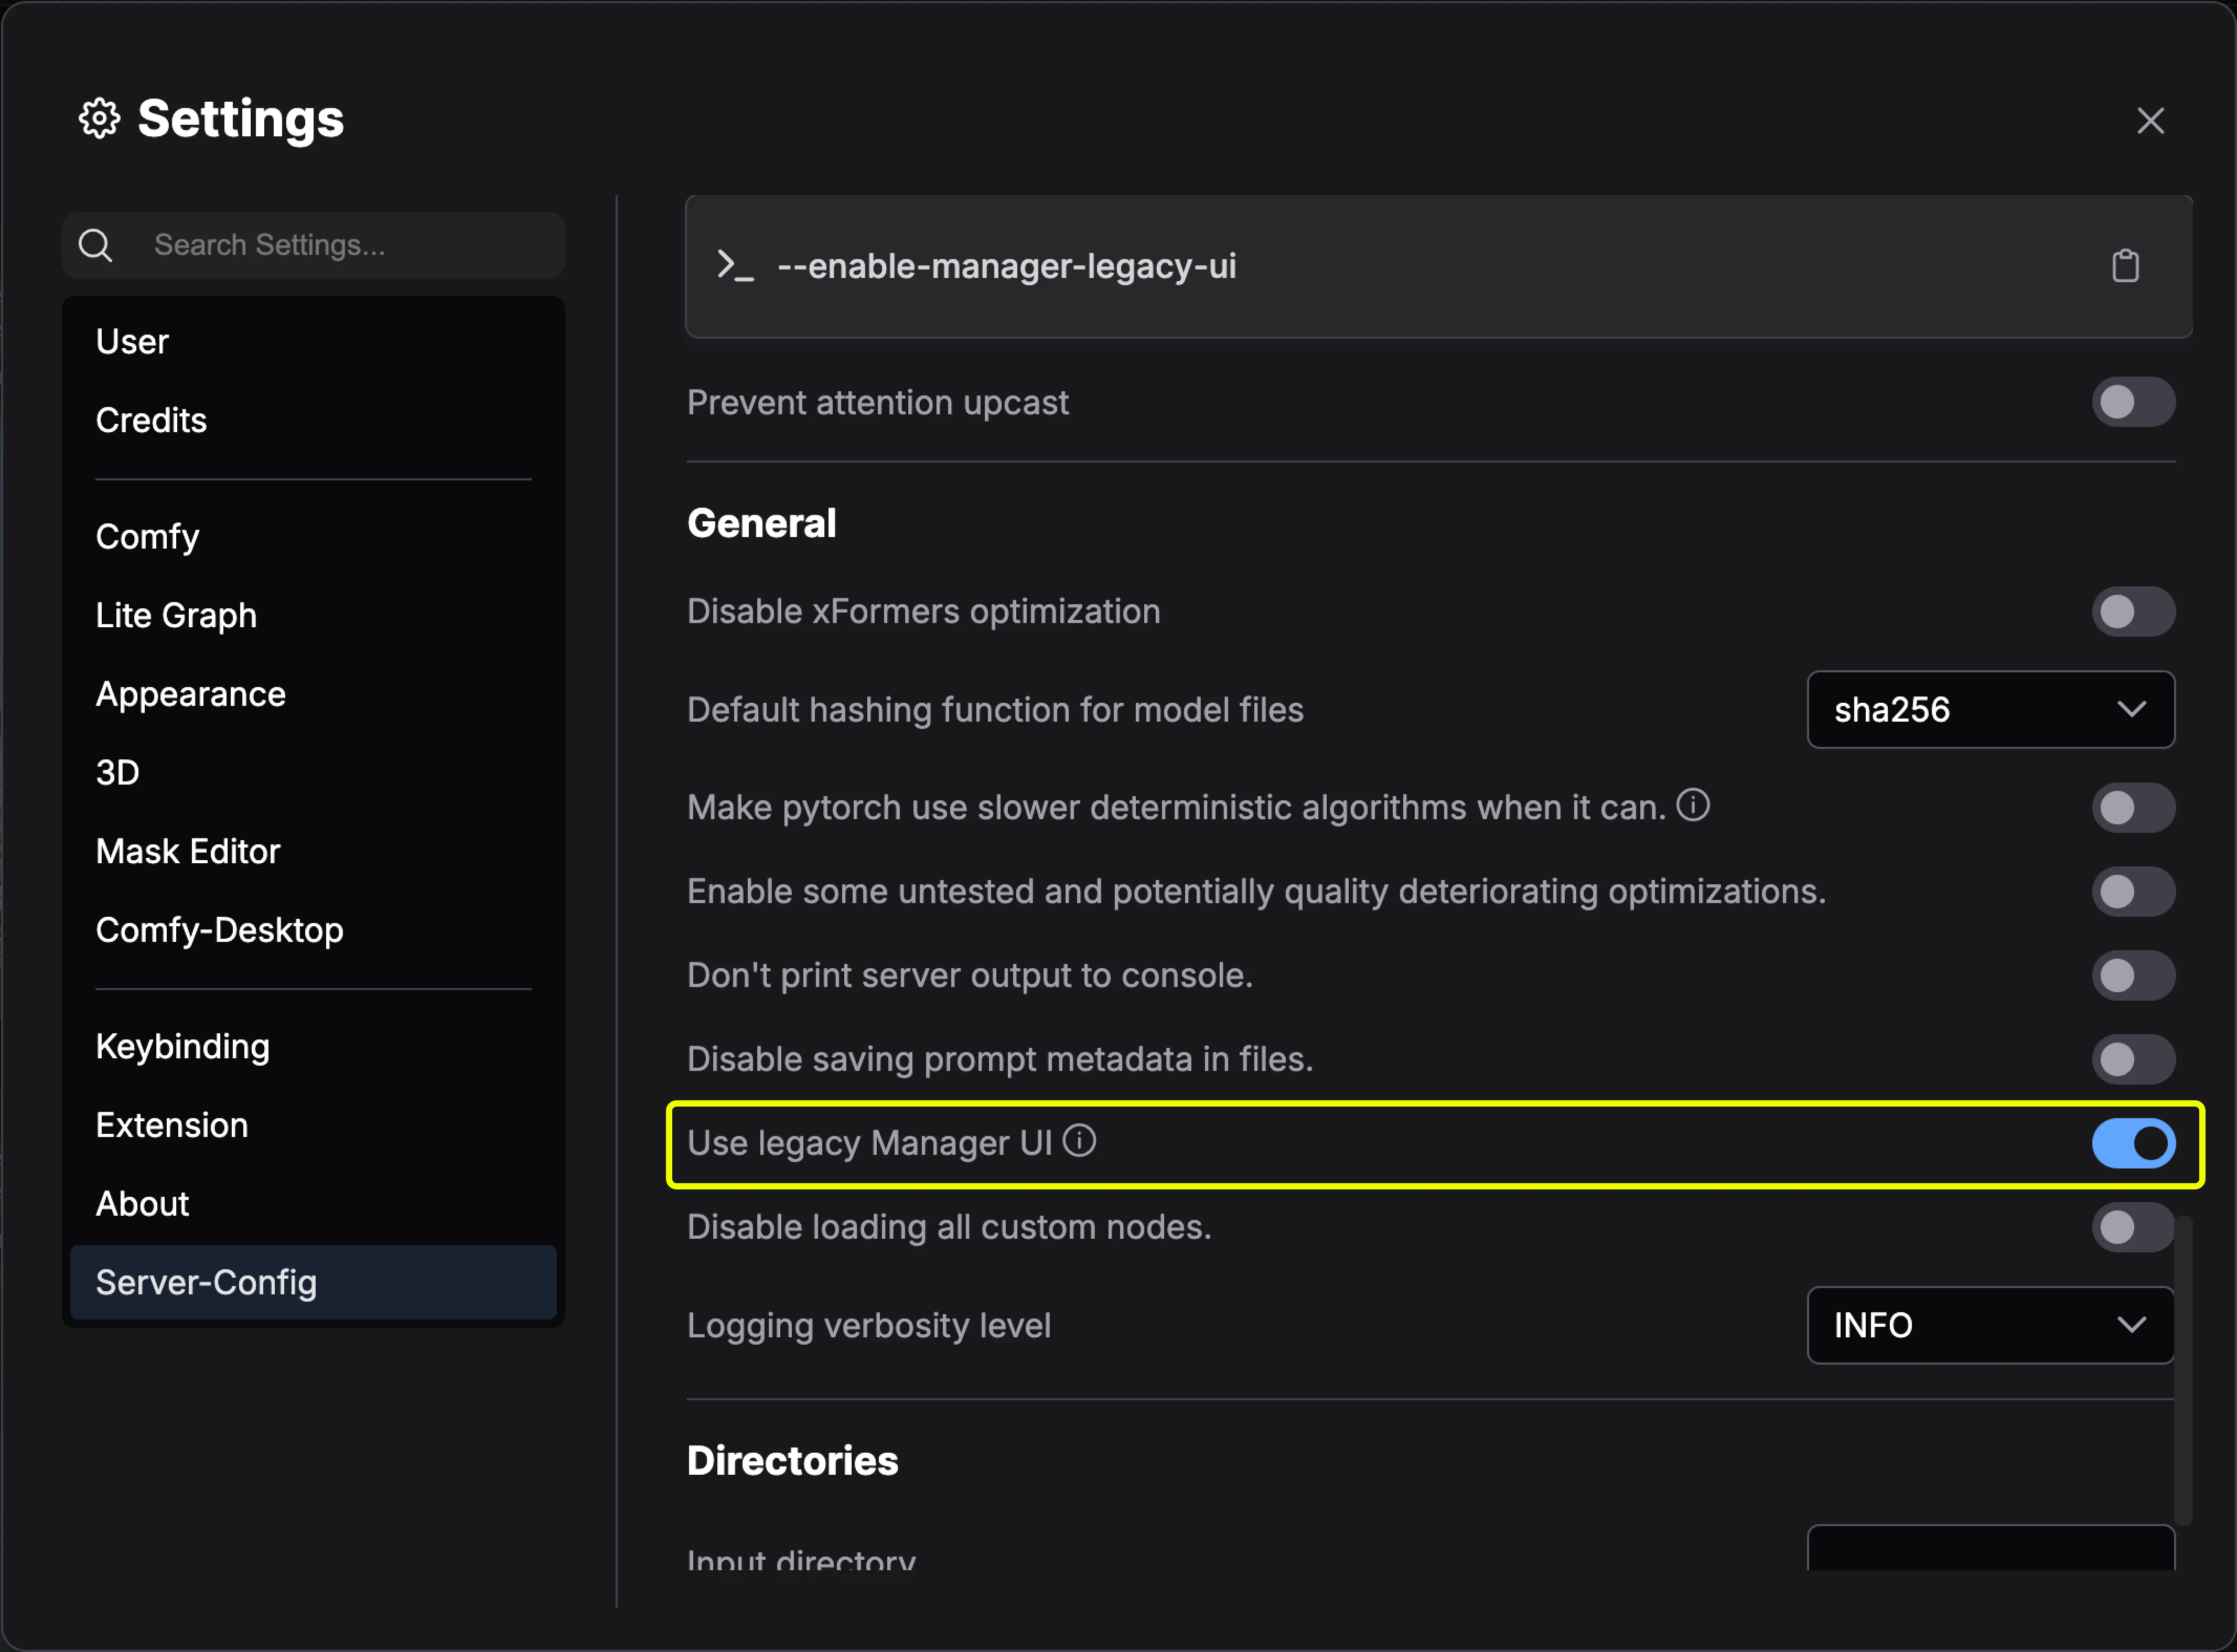
| `--enable-manager-legacy-ui` | 新版 UI の代わりに旧版管理者 UI を使用します(`--enable-manager` が必要) |
| `--disable-manager-ui` | バックグラウンド機能を維持しつつ、管理者 UI とエンドポイントを無効にします(`--enable-manager` が必要) |
### 新旧 UI の切り替え
以下のバージョン更新は pip インストールのみをサポートします。カスタムノード経由でインストールされたバージョンは、新版 UI への切り替えをサポートしません。
新版 UI を使用する場合:
```bash theme={null}
python main.py --enable-manager
```
旧版 UI を使用する場合:
```bash theme={null}
python main.py --enable-manager --enable-manager-legacy-ui
```
デスクトップ版ユーザーは、**サーバー設定 → UI 設定 → 旧版管理者インターフェースを使用**で旧版 UI に切り替えることができます
 ## レガシーなインストール方法
既存の ComfyUI インストールに追加して ComfyUI-Manager をインストールする場合:
1. ターミナルで `ComfyUI/custom_nodes` ディレクトリに移動します
2. リポジトリをクローンします:
```bash theme={null}
git clone https://github.com/ltdrdata/ComfyUI-Manager comfyui-manager
```
3. 管理者機能の依存関係をインストールします:
```bash theme={null}
cd comfyui-manager
pip install -r requirements.txt
```
4. ComfyUI を再起動します
1. [Git for Windows](https://git-scm.com/download/win) をインストールします(スタンドアロン版、「Use windows default console window」を選択)
2. [install-manager-for-portable-version.bat](https://github.com/ltdrdata/ComfyUI-Manager/raw/main/scripts/install-manager-for-portable-version.bat) を `ComfyUI_windows_portable` ディレクトリにダウンロードします
3. バッチファイルをダブルクリックしてインストールします
comfy-cli は、CLI から ComfyUI を管理するためのさまざまな機能を提供します。
**前提条件**: Python 3、Git
**Windows:**
```bash theme={null}
python -m venv venv
venv\Scripts\activate
pip install comfy-cli
comfy install
```
**Linux/macOS:**
```bash theme={null}
python -m venv venv
. venv/bin/activate
pip install comfy-cli
comfy install
```
参照:[comfy-cli ドキュメント](/comfy-cli/getting-started)
**前提条件**: python-is-python3、python3-venv、git
1. [install-comfyui-venv-linux.sh](https://github.com/comfy-org/ComfyUI-Manager/raw/main/scripts/install-comfyui-venv-linux.sh) を空のインストールディレクトリにダウンロードします
2. 実行します:
```bash theme={null}
chmod +x install-comfyui-venv-linux.sh
./install-comfyui-venv-linux.sh
```
3. `./run_gpu.sh` または `./run_cpu.sh` で ComfyUI を実行します
**インストール時の注意事項:**
* ComfyUI-Manager のファイルは正確にパス `ComfyUI/custom_nodes/comfyui-manager` に配置されている必要があります
* `ComfyUI/custom_nodes` に直接解凍しないでください(`__init__.py` などのファイルはそのディレクトリに存在すべきではありません)
* `ComfyUI/custom_nodes/ComfyUI-Manager/ComfyUI-Manager` や `ComfyUI/custom_nodes/ComfyUI-Manager-main` などのパスにはインストールしないでください
## レガシーなインストール方法
既存の ComfyUI インストールに追加して ComfyUI-Manager をインストールする場合:
1. ターミナルで `ComfyUI/custom_nodes` ディレクトリに移動します
2. リポジトリをクローンします:
```bash theme={null}
git clone https://github.com/ltdrdata/ComfyUI-Manager comfyui-manager
```
3. 管理者機能の依存関係をインストールします:
```bash theme={null}
cd comfyui-manager
pip install -r requirements.txt
```
4. ComfyUI を再起動します
1. [Git for Windows](https://git-scm.com/download/win) をインストールします(スタンドアロン版、「Use windows default console window」を選択)
2. [install-manager-for-portable-version.bat](https://github.com/ltdrdata/ComfyUI-Manager/raw/main/scripts/install-manager-for-portable-version.bat) を `ComfyUI_windows_portable` ディレクトリにダウンロードします
3. バッチファイルをダブルクリックしてインストールします
comfy-cli は、CLI から ComfyUI を管理するためのさまざまな機能を提供します。
**前提条件**: Python 3、Git
**Windows:**
```bash theme={null}
python -m venv venv
venv\Scripts\activate
pip install comfy-cli
comfy install
```
**Linux/macOS:**
```bash theme={null}
python -m venv venv
. venv/bin/activate
pip install comfy-cli
comfy install
```
参照:[comfy-cli ドキュメント](/comfy-cli/getting-started)
**前提条件**: python-is-python3、python3-venv、git
1. [install-comfyui-venv-linux.sh](https://github.com/comfy-org/ComfyUI-Manager/raw/main/scripts/install-comfyui-venv-linux.sh) を空のインストールディレクトリにダウンロードします
2. 実行します:
```bash theme={null}
chmod +x install-comfyui-venv-linux.sh
./install-comfyui-venv-linux.sh
```
3. `./run_gpu.sh` または `./run_cpu.sh` で ComfyUI を実行します
**インストール時の注意事項:**
* ComfyUI-Manager のファイルは正確にパス `ComfyUI/custom_nodes/comfyui-manager` に配置されている必要があります
* `ComfyUI/custom_nodes` に直接解凍しないでください(`__init__.py` などのファイルはそのディレクトリに存在すべきではありません)
* `ComfyUI/custom_nodes/ComfyUI-Manager/ComfyUI-Manager` や `ComfyUI/custom_nodes/ComfyUI-Manager-main` などのパスにはインストールしないでください